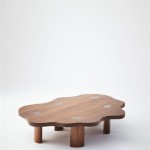
How to Refinish a Bedside Table
A bedside table is a small but important piece of furniture in your bedroom. It's a place to store your essentials, like your phone, charger, book, and alarm clock. It can also be a stylish addition to your room's décor.
If your bedside table is looking a little worse for wear, don't worry! Refinishing it is a relatively easy and inexpensive project that can make it look brand new again. Here's a step-by-step guide to help you get started:
Materials You'll Need:
- Sandpaper (120-grit and 220-grit)
- Wood filler
- Putty knife
- Primer
- Paint or stain
- Polyurethane
- Paintbrush or roller
- Rags or paper towels
Step-by-Step Instructions:
Step 1: Preparation
Remove all hardware from the bedside table. Then, clean the table with a damp cloth to remove any dirt or dust. Allow the table to dry completely.
Step 2: Sanding
Start by sanding the table with 120-grit sandpaper. This will remove the old finish and smooth out any rough spots.
Once you've sanded the entire table with 120-grit sandpaper, switch to 220-grit sandpaper. This will help to smooth the surface even further and prepare it for primer.
Step 3: Fill Holes and Cracks
If there are any holes or cracks in the table, fill them with wood filler. Use a putty knife to apply the wood filler and smooth it out. Allow the wood filler to dry completely.
Step 4: Prime the Table
Apply a coat of primer to the table using a paintbrush or roller. Primer helps to create a smooth surface for the paint or stain to adhere to. Allow the primer to dry completely.
Step 5: Paint or Stain the Table
Once the primer is dry, you can paint or stain the table. If you're painting the table, apply two coats of paint, allowing each coat to dry completely before applying the next.
If you're staining the table, apply one coat of stain and allow it to dry completely. You can then apply additional coats of stain if you want a darker finish.
Step 6: Apply Polyurethane
Once the paint or stain is dry, apply a coat of polyurethane to protect the finish. Polyurethane will help to seal the finish and protect it from scratches and wear.
Allow the polyurethane to dry completely before reattaching the hardware and placing the table back in your bedroom.
Tips:
- If you're not sure what color to paint or stain the table, you can test out different colors on a piece of scrap wood first.
- If you're staining the table, be sure to apply the stain in the direction of the wood grain.
- Allow plenty of time for each coat of paint, stain, or polyurethane to dry completely before applying the next coat.
- Once you've refinished the table, be sure to maintain the finish by wiping it down with a damp cloth regularly.
Conclusion:
Refinishing a bedside table is a great way to give it a new look and extend its lifespan. By following the steps outlined above, you can easily refinish your bedside table and make it look like new again.

Diy Refinishing Vintage Bedside Tables Classy Glam Living
Diy Refinishing Vintage Bedside Tables Classy Glam Living

Nightstand Makeover With White Paint Beginners Guide

How To Paint A Bedside Table Upcycling Project Dream Of Home

Refinishing Bedside Tables For A Profit I Furniture Restoration Beautiful Oak Transformation

Refinished Bedside Tables Diy

Here S Exactly How I Refinished Nightstands For Under 100

How To Paint Transform A Pair Of Bedside Tables

How To Re An Old Nightstand Wood Mike
Diy Refinishing Vintage Bedside Tables Classy Glam Living
Related Posts


