How to Build a Simple Square Coffee Table
Creating a coffee table adds a touch of personal style and functionality to any living space. Building a simple square coffee table is a rewarding DIY project that can be tackled by beginners with basic woodworking skills. This guide provides step-by-step instructions, essential materials, and helpful tips to guide you through the process.
Materials and Tools
Before starting, gather the necessary materials and tools for your project. You will need:
- 1x4 lumber (for the legs and frame)
- 1/2-inch plywood (for the tabletop)
- Wood glue
- Wood screws (2-inch and 1 1/2-inch)
- Wood stain or paint (optional)
- Finish (polyurethane or varnish, optional)
- Measuring tape
- Pencil
- Saw (circular saw or hand saw)
- Drill with drill bits
- Screwdriver
- Clamps
- Sandpaper (various grits)
- Safety glasses and ear protection
Building the Legs and Frame
Start by cutting the lumber for the table legs and frame. For a standard coffee table height of 18 inches, each leg should be 16 inches long. Cut four legs and four pieces of 1x4 lumber for the frame, each measuring the desired length for your table's width.
Once the pieces are cut, use wood glue and screws to assemble the frame. First, connect two of the 1x4 pieces to form a square, ensuring the corners are perfectly aligned. Repeat this process with the remaining two pieces. Then, attach the legs to the frame, one leg to each corner. Make sure the legs are positioned at the corners and flush with the outer edge of the frame. To create a sturdy structure, predrill holes slightly smaller than the screws to prevent the wood from splitting.
Constructing the Tabletop
Cut a square piece of plywood to match the desired dimensions of your tabletop. For a standard 24-inch square table, cut a 24x24 inch piece of plywood. Use wood glue and screws to secure the tabletop to the frame. First, apply wood glue to the top of the frame. Center the plywood on top of the frame and secure it with screws. Predrill holes to prevent splitting.
Finishing Touches
Once the table is constructed, sand all the surfaces smooth. Begin with a coarse-grit sandpaper and gradually move to finer grits. This will create a smooth, even finish. You can then stain or paint the table to achieve the desired aesthetic. Apply the stain or paint evenly with a brush or roller. Allow the stain or paint to dry completely before applying a sealant, if desired.
For added protection and a polished look, apply a clear coat of polyurethane or varnish. Allow the finish to dry completely before using the table.
Tips for Success
Here are some helpful tips to ensure a successful build:
- Use a measuring tape and pencil to accurately mark the wood before cutting.
- When cutting the lumber, use a saw guide or cut along a straight edge for precise cuts.
- Always wear safety glasses and ear protection while using power tools.
- Ensure the frame corners are perfectly aligned for a square table.
- Clamp the pieces together while securing them with screws to prevent warping or movement.

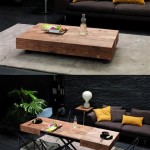
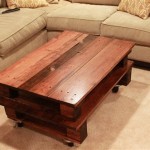
Square Coffee Table W Planked Top Free Diy Plans

How To Build A Diy Coffee Table Square Thediyplan

Square Solutions Coffee Table Plans Ana White

Square Coffee Table W Planked Top Free Diy Plans

Build An Easy Diy Square Farmhouse Coffee Table Yourself Hometalk

Square Coffee Table W Planked Top Free Diy Plans

Square Coffee Table W Planked Top Free Diy Plans

Diy Square Coffee Table

Diy Simple Square Coffee Table Shanty 2 Chic

Build An Easy Diy Square Farmhouse Coffee Table Yourself Hometalk
Related Posts