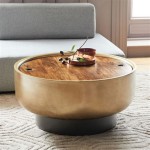
How to Distress a Table with Chalk Paint
Distressing furniture is a popular technique that adds character and a vintage look to any piece. Chalk paint, with its matte finish and ability to adhere to almost any surface, is an ideal medium for distressing. It allows for a controlled level of wear and tear, creating a beautifully aged appearance. This article will guide you through the process of distressing a table with chalk paint, explaining the necessary steps and techniques for achieving the desired effect.
1. Preparation and Painting
Before distressing, ensure the table is clean and free of dust or debris. Lightly sand the surface to create a more receptive base for the chalk paint. This is especially important for glossy surfaces, which might otherwise prevent the paint from adhering properly. Next, select your desired chalk paint color and apply it evenly to the surface. Let the paint dry completely before moving on to the distressing process.
It is vital to remember that chalk paint dries quickly. If you are applying multiple coats, allow each coat to dry thoroughly before applying the next. This prevents muddiness and unevenness in the final finish.
2. Distressing Techniques
Distressing involves creating a worn and weathered look. Chalk paint offers various techniques for achieving this, depending on the desired effect:
- Sanding: Using fine-grit sandpaper, gently rub over edges, corners, and areas where natural wear and tear would occur. Focus on creating subtle scratches and abrasions, avoiding excessive sanding that could remove too much paint.
- Waxing: Apply a clear wax to areas where you want to create a more pronounced distressed look. Let the wax dry, then use a soft cloth to rub it into the surface. This technique will leave a subtle sheen while highlighting the details.
- Scraping: A scraper tool can be used to create deeper grooves and scratches for a more dramatic distressed effect. Carefully use the scraper to remove areas of paint, creating the illusion of chipped and weathered wood.
Experiment with these methods to achieve the desired level of distress. Always remember to work in a well-ventilated area and protect your work surface from accidental spills. Be patient and take your time; the final result will reflect the effort you put into the process.
3. Finishing Touches
Once you are satisfied with the distressed look, seal the chalk paint with a clear wax or sealant. This will protect the paint from scratches and spills, enhancing the distressed look. If you're going for a more aged appearance, consider using a dark wax to accentuate the distressed areas, giving them an even deeper, more antique quality. For a more modern look, a clear wax will maintain the original color of the chalk paint.
After applying the wax, buff the surface with a soft cloth to achieve a beautiful and smooth finish. The protective layer will provide a durable coating that will last for years to come. Remember to allow adequate time for the wax to cure before placing objects on your newly distressed table.
Distressing a table with chalk paint opens up numerous possibilities for creating personalized and unique furniture. It can transform an ordinary piece into a statement piece, adding a touch of warmth and character to any room. With some practice and patience, you can master this technique and create stunning pieces that will be admired for years to come.

Painted Furniture Ideas 3 Easy Steps To Distressing With Chalk Paint

3 Best Ways How To Distress Wood And Furniture With Paint Angela Marie Made

How To Annie Sloan Chalk Paint Distressed Furniture Distressing

How To Distress Furniture With Chalk Paint Let S

Beautiful Diy Distressed Gray Chalk Paint Furniture Makeover Abbotts At Home

Distressed Chalk Paint Desk Makeover How To Nest For Less

Distressing With Chalk Paint Table And Chairs Makeover

How To Distress Using Paint Furniture Refinishing Distressed

The Beginner S Guide To Distressing Furniture With Chalk Paint

Diy Distressed Furniture Chalk Paint Recipe Brantly Wyatt
Related Posts

