DIY Lift Top Coffee Table with Storage: A Step-by-Step Guide
A lift top coffee table with storage is a versatile and stylish furniture piece that combines functionality and aesthetics. Whether you need extra storage for blankets and pillows, a dedicated workspace, or a convenient spot to enjoy snacks and drinks, this DIY project offers a perfect solution. With careful planning and a bit of effort, you can create a stunning and practical piece that will enhance your living room décor.
Materials You'll Need:
1. 1x6 pine boards (quantity will vary depending on the size of the table) 2. 1x8 pine boards (for the top) 3. 2x4 pine boards (for the legs) 4. Wood glue 5. 1 1/4-inch wood screws 6. 2-inch wood screws 7. Lift top hinges 8. Piano hinges 9. Drawer slides (optional) 10. Finishing nails 11. Sandpaper 12. Stain or paint (optional)
Step-by-Step Instructions:
1. Build the Base:
a. Cut the 2x4 pine boards to the desired length for the legs. b. Assemble the legs and side rails using wood glue and 2-inch wood screws. c. Attach the bottom supports to the legs for added stability.
2. Create the Tabletop Frame:
a. Cut the 1x6 pine boards to the desired length and width for the tabletop frame. b. Join the frame using wood glue and 1 1/4-inch wood screws.
3. Attach the Tabletop:
a. Cut the 1x8 pine boards to the same length and width as the tabletop frame. b. Align the tabletop boards on the frame and secure them with wood glue and 1 1/4-inch wood screws. c. Sand the tabletop smooth.
4. Install the Lift Top Hardware:
a. Measure and mark the center of the tabletop. b. Install the lift top hinges on the tabletop and base, following the manufacturer's instructions. c. Test the lift top to ensure it operates smoothly.
5. Create the Storage Drawer (Optional):
a. Cut the 1x6 pine boards to the desired size for the drawer sides, front, and back. b. Assemble the drawer using wood glue and 1 1/4-inch wood screws. c. Attach the drawer slides to the drawer and the interior of the base.
6. Add Finishing Touches:
a. Sand the entire table to remove any rough edges. b. Stain or paint the table as desired. c. Insert the drawer into its designated space. d. Install the piano hinge on the back of the lift top for added stability.
Tips for a Successful Build:
1. Use high-quality materials for durability. 2. Measure and cut accurately for a precise fit. 3. Apply wood glue liberally for strong joints. 4. Pre-drill holes before inserting screws to prevent splitting. 5. Sand thoroughly before staining or painting for a smooth finish. 6. Test the lift top hinge mechanism thoroughly before final assembly. 7. Adjust the drawer slides as needed to ensure smooth operation.
Conclusion:
Building a DIY lift top coffee table with storage is a rewarding project that combines creativity and practicality. By following these step-by-step instructions and incorporating these tips, you can create a stylish and functional piece that will enhance your living space for years to come.

Diy Lift Top Coffee Table Step By Instructions Chisel Fork

Diy Lift Top Coffee Table Step By Instructions Chisel Fork

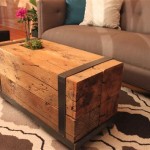
How To Build A Lift Top Coffee Table With Storage And Copper Pipe Base Crafted Work

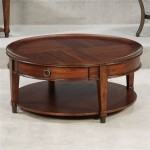
Lift Top Coffee Table Ana White

Diy Lift Top Coffee Table Step By Instructions Chisel Fork

Diy Lift Top Coffee Table Step By Instructions Chisel Fork

Diy Lift Top Coffee Table Step By Instructions Chisel Fork Hinges

How To Build A Lift Top Coffee Table With Storage And Copper Pipe Base Crafted Work

How To Build A Lift Top Coffee Table With Storage And Copper Pipe Base Crafted Work

Diy Lift Top Coffee Table Step By Instructions Chisel Fork
Related Posts