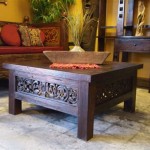
How to Distress a Coffee Table with Chalk Paint and Wood
Distressing furniture is a popular technique that gives pieces a vintage or antique appearance. This process involves creating wear and tear on the surface to reveal underlying layers of paint or wood. Chalk paint, with its matte finish and ability to adhere to various surfaces, is an excellent choice for distressing furniture. Combining chalk paint with wood creates a beautiful contrast and adds depth to the final look. Here's a comprehensive guide on how to distress a coffee table using chalk paint and wood.
Choosing the Right Supplies
Before embarking on your distressing project, ensure you have all the necessary supplies. This will streamline the process and prevent any delays.
- Chalk paint: Select a color that complements the wood of your coffee table. Popular choices include white, gray, black, or a muted shade of blue or green.
- Paintbrushes: Choose a variety of brush sizes for different applications. A wider brush will be helpful for covering large areas, while a smaller brush will be useful for detailing.
- Sandpaper: You will need sandpaper in various grits, ranging from coarse to fine. The coarser sandpaper will be used for creating the initial distress marks, while the finer sandpaper will be used for smoothing out any rough edges.
- Wax: A clear or tinted wax can be applied to the finished piece to seal the paint and provide a protective layer.
- Drop cloth: Protect your work area from paint splatters and spills.
- Gloves: Wearing gloves will keep your hands clean during the painting process.
- Paint thinner: Use a paint thinner specifically designed for chalk paint to clean brushes and tools.
Preparing the Coffee Table
Proper preparation is key to achieving a flawless distressed look on your coffee table. This involves cleaning, sanding, and priming the surface.
- Clean the Surface: Wipe down the coffee table with a damp cloth to remove dust, dirt, and any prior coatings. Allow it to dry completely before proceeding.
- Sand the Surface: Use medium-grit sandpaper to lightly sand the coffee table's surface. This will create a better adhesion for the chalk paint and enhance the distressing effect.
- Prime the Surface: Apply a primer specifically designed for chalk paint. This will create a smooth and even surface allowing the paint to adhere better.
Applying the Chalk Paint
With the surface prepared, you can now apply the chalk paint. This involves using even strokes and multiple thin coats for a smooth, consistent finish.
- Apply the First Coat: Use a paintbrush to apply the first coat of chalk paint in long, even strokes. Avoid overloading the brush as this could result in drips and uneven coverage.
- Allow the First Coat to Dry: Let the first coat of paint dry completely before applying the next. Drying time can vary depending on the specific chalk paint used and the environmental conditions.
- Apply Additional Coats: Apply additional coats of chalk paint as needed to achieve the desired level of coverage and color intensity. Let each coat dry thoroughly before moving on to the next.
Distressing the Coffee Table
The distressing process is where the magic happens, giving your coffee table a unique, aged appearance.
- Create Initial Distress Marks: Use a coarse-grit sandpaper to create initial distress marks on the edges, corners, and high-wear areas of the coffee table. This will reveal the wood underneath the paint.
- Distress Specific Areas: Use fine-grit sandpaper to create finer distress marks, adding a more subtle and realistic aged look. You can focus on areas that would naturally show wear and tear over time, like the edges, knots, and corners.
- Apply Wax: Apply a clear or tinted wax to the entire surface of the coffee table. The wax will seal in the paint and provide a protective layer. Additionally, it will create a more vintage feel and enhance the distressed look.
- Seal the Paint: Applying a sealant, such as a clear acrylic varnish, will protect the chalk paint from scratches and wear and tear. Choose a matte finish to preserve the chalk paint's original appearance.
- Apply Stain: If desired, you can apply a wood stain to the exposed wood areas. This will enhance the contrast between the wood and the chalk paint and create a more rustic look.
Finishing Touches
After distressing the table, add finishing touches, such as applying a sealant or stain to enhance the overall look.
By following this comprehensive guide, you can successfully distress your coffee table using chalk paint and wood, creating a beautiful and unique piece of furniture that reflects your personal style.

Coffee Table Makeover With Chalk Paint

Distressed Coffee Table A Revisit Rework The Painted Hive

Coffee Table Makeover With Chalk Paint Flippin Friday

Coffee Table Makeover At Home With The Barkers

Coffee Table Makeover Man Cave Furniture With Rust Paint Do Dodson Designs

Chalk Paint Coffee Table Makeover Step By Diy Guide Bricks N Blooms With Stacy Ling

20 Coffee Table Makeover From Orange Oak To White

Distressed Coffee Table Timeless Creations

Distressed Coffee Table A Revisit Rework The Painted Hive

Easy Chalk Paint Coffee Table Makeover You Need To See Sunnyside Home
Related Posts

