How to Craft a Lift-Up Coffee Table: A Comprehensive Guide
A lift-up coffee table adds a touch of elegance and functionality to any living room. Boasting a hidden storage compartment, these tables are not only stylish but also practical. Creating your own lift-up coffee table may seem daunting, but with the right materials and a little elbow grease, it's a task you can accomplish. Follow this comprehensive guide to build a stunning and useful piece that will elevate your living space.
Materials Required
- 1x4 pine boards (3 for the frame and 2 for the legs)
- 1x6 pine boards (1 for the top and 1 for the base)
- 1/2-inch plywood (for the bottom and sides of the storage compartment)
- Wood screws
- Wood glue
- Clamps
- Safety glasses
- Drill
- Saw
- Sandpaper or sanding block
- Finish of your choice (e.g., paint, stain, or polyurethane)
Step 1: Building the Frame
Start by cutting the 1x4 pine boards to the desired length for the frame. Typically, a coffee table frame is around 48 inches long and 24 inches wide. Assemble the frame by attaching the side pieces to the top and bottom pieces using wood screws and glue. Reinforce the joints with clamps.
Step 2: Creating the Legs
Cut the remaining 1x4 pine boards for the legs to the desired height. Attach the legs to the corners of the frame using wood screws and glue. Ensure the legs are securely attached and perpendicular to the frame.
Step 3: Building the Top
Cut the 1x6 pine board to the same dimensions as the frame. Place the board on top of the frame and secure it with wood screws. Countersink the screws slightly below the surface of the wood to create a smooth finish.
Step 4: Constructing the Storage Compartment
Cut the 1/2-inch plywood to create the bottom and side panels of the storage compartment. The bottom panel should fit snugly inside the frame, while the side panels should be cut slightly shorter to allow for the lift-up mechanism.
Step 5: Installing the Lift-Up Mechanism
You can use a variety of hardware options for the lift-up mechanism, such as piano hinges or gas struts. Follow the manufacturer's instructions for the specific hardware you choose to install the mechanism on the top and the inside of the frame.
Step 6: Finishing Touches
Sand any rough edges or imperfections on the table. Apply your desired finish, whether it's paint, stain, or polyurethane. Allow the finish to dry completely and enjoy your custom-crafted lift-up coffee table!
Tips for Success
Use high-quality materials for durability and longevity.
Measure twice, cut once to ensure precision.
Reinforce all joints for sturdiness.
Consider adding decorative elements, such as trim or handles, to enhance the table's aesthetic.

Diy Lift Top Coffee Table Step By Instructions Chisel Fork

Diy Lift Top Coffee Table Step By Instructions Chisel Fork

Multifunctional Coffee Table Tiny Apartment Build Ep 19

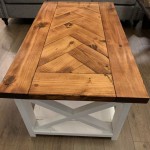
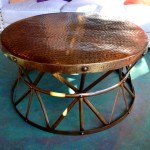
How To Build A Lift Top Coffee Table With Storage And Copper Pipe Base Crafted Work

How To Build A Lift Top Coffee Table With Storage And Copper Pipe Base Crafted Work

Diy Lift Top Coffee Table Step By Instructions Chisel Fork

Diy Lift Top Coffee Table Makeover Sabrinas Organizing

16 Lift Top Coffee Tables That Surprise You In The Best Way Possible

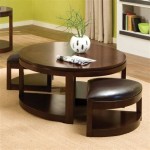
Bidiso Lift Top Coffee Center Table With Storage Compartment Easy To Assembly Dining For Living Room Reception Home Office Oak

Pakasept Lift Top Coffee Table 3 In 1 Multi Function With 4 Storage Bench 39 Modern Dining For Living Room Reception Rustic Brown Com
Related Posts