How to Make a Simple Wooden Coffee Table
Creating a coffee table from scratch is a rewarding project that allows you to personalize your living space with a unique piece of furniture. This guide outlines the steps involved in building a simple wooden coffee table, suitable for beginners with basic woodworking skills. While this project requires some time and effort, the process is straightforward and can be adapted to fit individual preferences.
Choosing Your Materials
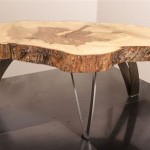
Before embarking on the building process, selecting appropriate materials is vital. Consider the size and style of the table you envision. The primary material choice is wood, and numerous options exist. For a rustic look, reclaimed wood or rough-cut lumber can be used. Hardwoods like oak, maple, or cherry provide durability and a classic finish. Softwoods such as pine or cedar offer affordability while still providing a pleasing aesthetic. The choice of wood type will impact the table's overall look and price.
In addition to the wood for the tabletop and frame, you will need other materials: *
Wood glue:
For securely bonding the pieces. *Wood screws:
For fastening the frame. *Wood filler:
For filling any gaps or imperfections. *Sandpaper:
To smooth the wood and prepare for finishing. *Wood stain or paint:
To enhance the wood's natural beauty or to create a desired color. *Clear coat:
To protect the finish and the wood. *Hardware:
For attaching the legs to the table frame (e.g., bolts, nuts, washers).Constructing the Coffee Table Frame
Once the materials are gathered, the frame construction can begin. This step involves cutting the wood to the desired dimensions and joining the pieces using wood glue and screws. Here's a step-by-step guide:
- Measure and cut the wood: Determine the desired length and width of the table frame. Cut the wood to these measurements using a saw. Ensure the cuts are precise and square.
- Assemble the frame: Lay the cut pieces together, ensuring they are flush and aligned. Apply wood glue to the joint edges and secure the pieces together using wood screws. Make sure the screws are countersunk to avoid protruding.
- Strengthen the frame: For added stability, consider adding diagonal braces or cross members to the frame. This step is especially important if the table is large or will be exposed to heavy use.
- Clean up: Once the frame is assembled, use sandpaper to smooth out any rough edges and remove any excess glue.
Creating the Tabletop
The tabletop is the most prominent feature of the coffee table, and its construction requires careful attention to detail. The tabletop can be made from a single piece of wood or multiple pieces joined together. There is a broad range of options: *
Single plank:
A single piece of wood provides a simple and elegant look. *Plank assembly:
This involves joining multiple planks together to create a larger tabletop. *Plywood:
This cost-effective option offers stability and is easy to work with. *Reclaimed wood:
Utilizing salvaged wood can create a unique and rustic look.Regardless of the material chosen, the tabletop should be cut to the desired dimensions, sanded smooth, and finished to match the frame. If multiple pieces of wood are being used, ensure they are properly aligned and joined using wood glue and screws.
Finishing Touches
After the table is assembled, the final step is to add finishing touches to enhance its appearance and protect the wood. This includes sanding, staining, painting, and applying a clear coat. Here's a breakdown:
- Sanding: Thoroughly sand the table with increasing grit sandpaper, starting with coarse-grit paper and finishing with fine-grit paper. This step creates a smooth surface for the finish to adhere to.
- Staining or painting: Apply stain or paint to the wood using a brush or cloth, following the manufacturer's instructions. Allow the stain or paint to dry completely.
- Clear coat: Apply a clear coat of polyurethane or varnish to protect the finish and enhance the wood's appearance. Multiple coats may be needed for optimal protection. Allow each coat to dry completely before applying the next.
- Attaching legs: Once the finish has completely dried, attach the table legs to the frame using bolts, nuts, and washers. Ensure the legs are securely attached and level before use.
With the finishing touches complete, your handmade coffee table is ready to be enjoyed in your living space. This project is a great way to add a personal touch and reflect your individual style. By following these steps and adapting them to your own preferences, you can create a beautiful and functional coffee table that will be treasured for years to come.

12 Diy Coffee Tables How To Make A Table

Diy Simple Wood Slab Coffee Table Remodelaholic

Diy Wooden Coffee Table A Beautiful Mess
:max_bytes(150000):strip_icc()/ana-white-x-free-coffee-table-plans-5807a1ec3df78cbc286233ba.jpg?strip=all "19 Free Diy Coffee Table Plans You Can Build Today")
19 Free Diy Coffee Table Plans You Can Build Today

More Like Home Round Coffee Tables 4 Easy To Build Styles Day 10

Diy Pallet Wood Coffee Table

More Like Home Simple Four Poster Coffee Table Plans Day 1

Diy Wood Coffee Table Growing Up Kemper

12 Diy Coffee Tables How To Make A Table

How To Make A Wood Coffee Table With Steel Accents
Related Posts