How to Make a Small Round Side Table
A small round side table is a versatile and stylish addition to any room. It can be used to hold drinks, snacks, books, or decorative items. It can also be used to create a cozy conversation area or to add a touch of elegance to a minimalist design. While you can find many pre-made side tables in stores, making your own can be a rewarding and cost-effective way to create a piece that is uniquely yours. This article will guide you through the process of making a small round side table using basic materials and techniques.
Choosing Materials and Tools
The first step is to choose the materials and tools you will need. Here are some common materials for a small round side table:
- Wood: This is a classic choice for side tables. You can use plywood, MDF, or solid wood. Choose a wood that is strong enough to hold the weight of the table and that has a finish you like.
- Metal: Metal can be used for the base or the top of the table. It is a durable and modern material. You can choose from steel, iron, or aluminum.
- Glass: Glass can be used for the top of the table. It is a stylish and elegant material. Choose tempered glass for safety.
- Acrylic: Acrylic is a lightweight and durable alternative to glass. It is also available in a variety of colors.
Here are some essential tools you will need:
- Circular saw: This is used to cut the wood to size.
- Jig saw: This is used to cut curves and intricate shapes.
- Sandpaper: This is used to smooth the surfaces of the wood.
- Drill: This is used to create holes for screws and other fasteners.
- Screwdriver: This is used to drive screws.
- Clamps: These are used to hold wood pieces together while gluing or screwing them.
- Measuring tape: This is used to measure the dimensions of the table.
- Pencil: This is used to mark the wood where you need to cut or drill.
- Wood glue: This is used to join wood pieces together.
- Finish (paint, stain, or varnish): This is used to protect the wood and give it a desired look.
Constructing the Base
The base of your side table will determine its overall stability and style. There are many ways to construct a base, depending on the material and desired look. Here are two popular options:
Option 1: Tripod Base
A tripod base is a simple and elegant design that is easy to build. It requires three legs that are connected to a central ring or plate. To make a tripod base:
- Cut your desired shape and size of the legs from your chosen material (wood, metal, etc.).
- Cut a central ring or plate that is large enough to hold the legs together.
- Drill holes in the bottom of each leg and in the ring or plate to create a connection point.
- Attach the legs to the ring or plate using screws, bolts, or welding depending on your chosen materials.
- Securely connect the legs to the ring or plate.
- Adjust the legs to ensure the base is level and stable.
Option 2: Four-legged Base
A four-legged base provides even more stability and can offer a more traditionally styled look. It may require a bit more construction but offers a wider range of design options.
- Cut four identical legs from your chosen material.
- Cut a square or rectangular frame from your chosen material to connect the legs.
- In each corner of the frame, create a secure attachment point for the legs.
- Attach the legs to the frame using screws, bolts, or welding depending on your chosen materials.
- Ensure the legs are securely attached and the frame is level and stable.
Creating the Tabletop
The tabletop is the most visible part of your side table. It should be the desired size and shape and be made from a material that complements the base. Here are some steps to create a tabletop:
- Cut a round piece of wood, metal, acrylic, or glass to the desired size.
- Sand the edges of the tabletop smooth.
- If using wood, apply a finish (paint, stain, or varnish) to protect the wood and give it a desired look.
- If using metal, acrylic, or glass, ensure the surface is clean and free of any imperfections.
Attaching the Tabletop to the Base
After constructing the base and tabletop, you need to attach the tabletop to the base. This can be done using a variety of methods, depending on the materials used.
- Screws: If using wood for both the base and tabletop, screws can be used to attach the tabletop to the base. Pre-drill holes to avoid splitting the wood.
- Bolts: For metal bases and tops, bolts can be used for a secure and durable connection.
- Glue and Clamps: For some wood and metal combinations, glue and clamps can be a viable option, especially if the connection is hidden within the table design.
- Brackets: In some cases, brackets can be used to attach the tabletop to the base, especially if the table is designed with an overhang or more complex shape.
Ensure the tabletop is securely attached to the base, and the table is level and stable. You can now enjoy your new handmade small round side table!
Remember, this is a basic guide for making a small round side table. The specific steps and techniques will vary depending on your chosen materials, design, and desired level of complexity. You can find many resources online, including tutorials and plans to help you create your own side table.

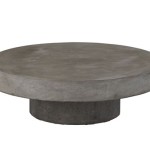
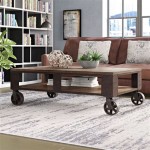
Diy Round Coffee Table

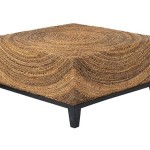
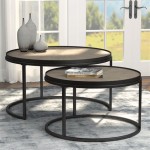
Build A Round Side Table Basic

Diy Small Side Table The Inspired Work

Diy End Table Angela Marie Made

Diy Small Side Table The Inspired Work

Build A Round Side Table Building Plans And Instructions By Buildbasic Www Basic Com Diy Bedroom Design

Diy Round Side Table With Antique Legs And Vintage Quilt Stencil Beautify Creating Beauty At Home

Diy Round Coffee Table

Diy Small Side Table The Inspired Work

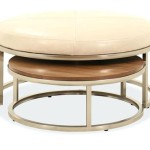
I Love This Diy Side Table With A Pedestal Base Build Plan Steps And Abbotts At Home
Related Posts