How To Make A Table Top From Pallet Wood
Pallet wood offers a cost-effective and environmentally friendly option for creating unique furniture pieces. Constructing a table top from reclaimed pallet wood requires some effort but yields a rewarding project with a rustic, industrial, or farmhouse aesthetic. This article details the steps involved in creating a beautiful and functional table top from reclaimed pallet wood.
1. Gathering Materials and Tools: The initial step involves acquiring the necessary materials and tools. One will need several pallets, the quantity depending on the desired table top size. Ensure the pallets are heat-treated (HT) and not chemically treated (MB). Look for markings indicating "HT" for safe usage. Additional materials include wood screws, wood glue, sandpaper (various grits), wood stain or paint (optional), polyurethane or other sealant, and safety glasses.
Necessary tools include a crowbar, hammer, reciprocating saw or hand saw, circular saw or table saw, measuring tape, pencil, safety glasses, dust mask, gloves, and clamps. A nail gun can significantly expedite the process, though it is not mandatory.
2. Dismantling the Pallets: Carefully dismantle the pallets using a crowbar and hammer. Work slowly and methodically to minimize damage to the wood. Insert the crowbar between the planks and gently pry them apart. A reciprocating saw can cut through nails for more stubborn boards, though this method may result in shorter planks.
3. Preparing the Wood: Once the pallets are dismantled, inspect the wood for any protruding nails. Remove any remaining nails with a hammer and nail puller or by carefully driving them through the wood with a nail set. Clean the wood with a brush or compressed air to remove dirt, debris, and loose splinters.
4. Planing and Cutting the Wood: Planing the wood is crucial for creating a smooth, even surface. A planer or electric hand planer removes the rough surface and creates consistent plank thickness. If access to a planer is limited, sanding can achieve a similar result, though considerably more effort is required.
After planing, cut the planks to the desired length for the table top, using a circular saw or table saw. Consider the final dimensions of the table top and ensure consistent length for all planks. Allow for slight variations in width to contribute to the rustic aesthetic.
5. Arranging and Joining the Planks: Arrange the planks on a flat surface in the desired pattern. Consider the natural variations in color and grain to create a visually appealing arrangement. Once satisfied with the arrangement, use wood glue and clamps to join the planks edge to edge. Ensure tight joints between planks to minimize gaps. Allow the glue to dry completely according to the manufacturer's instructions.
6. Securing the Table Top: For added stability and strength, secure the joined planks with support boards. Cut support boards, typically 2x4s, to a length slightly shorter than the width of the table top. Attach these support boards perpendicular to the planks on the underside of the table top using wood screws and wood glue. Space the support boards evenly to ensure uniform support.
7. Sanding and Finishing: Once the glue and screws are set, sand the entire surface of the table top thoroughly. Start with a coarser grit sandpaper (e.g., 80-grit) to remove any remaining imperfections and level the surface. Gradually progress to finer grits (e.g., 120, 150, 220-grit) to achieve a smooth finish. Pay particular attention to the edges and corners of the table top.
8. Staining or Painting (Optional): If desired, apply a wood stain or paint to the table top. This step allows for customization of the final appearance. Follow the manufacturer's instructions for application and drying times. Multiple coats may be necessary for desired color saturation.
9. Sealing the Table Top: Apply a sealant, such as polyurethane, to protect the wood and enhance its durability. Follow the manufacturer's instructions carefully. Multiple coats of sealant may be necessary, allowing sufficient drying time between each coat. Lightly sand between coats with fine-grit sandpaper for optimal smoothness.
10. Attaching the Table Top to a Base: Once the sealant has cured completely, the table top is ready to be attached to a base. The method of attachment will depend on the design of the base. Common methods include using screws, brackets, or a combination thereof. Ensure a secure and stable connection between the table top and the base.

Build A Diy Pallet Table With Herringbone Design Lovely Greens

How To Build A Farmhouse Table With Pallet Wood Herringbone Top Kezzabeth Diy Renovation Blog

Wood Pallet Table Diy A Beautiful Mess

Beautiful Potentially Short Lived Tabletop Made From Pallet Wood Core77

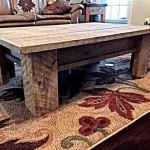
Diy Pallet Wood Coffee Table

Wood Pallet Table Diy A Beautiful Mess

25 Unique Diy Pallet Table Ideas 99 Pallets Casa Palete Reciclado Móveis

Beautiful Potentially Short Lived Tabletop Made From Pallet Wood Core77

One Of A Kind Pallet Wood Dining Table

Diy Pallet Table Tops
Related Posts