How To Make A Table Top Out Of Pallet Wood
Creating a table top from pallet wood offers a cost-effective and environmentally conscious way to furnish a space with a rustic, unique piece. This process involves several key steps, from selecting and preparing the wood to assembling and finishing the tabletop.
Gathering Materials and Tools
The initial stage involves gathering the necessary materials and tools. Several pallets will be required, depending on the desired tabletop dimensions. Ensure the pallets are heat-treated (HT) rather than chemically treated (MB), which can be hazardous. Tools required include a crowbar, hammer, nail puller, safety glasses, gloves, a circular saw or hand saw, a planer, sander (belt sander and orbital sander are ideal), wood glue, clamps, wood screws, measuring tape, and a pencil.
Disassembling the Pallets
Dismantling the pallets is often the most labor-intensive part of the process. Carefully insert the crowbar between the pallet boards and the supporting structure. Gently pry the boards loose, minimizing damage. A nail puller can be used to remove any remaining nails. This process requires patience and attention to detail to avoid splitting the wood.
Preparing the Wood
Once the boards are removed, they need to be prepared for assembly. This involves removing any remaining nails or staples and cleaning the wood. A planer is crucial for creating a uniform thickness across all boards, ensuring a level tabletop surface. Planing also removes any rough or weathered surfaces. After planing, sanding the boards smooth is essential. Start with a coarse grit sandpaper (e.g., 60 grit) and progressively move to finer grits (e.g., 120, 220 grit) for a polished finish.
Cutting the Wood to Size
Measure the desired dimensions of the tabletop and cut the pallet boards accordingly using a circular saw or hand saw. Ensure all cuts are straight and precise for a professional-looking finished product. Consider the desired pattern for the tabletop during this step. A simple, linear arrangement is straightforward, but more complex patterns, such as herringbone, require careful planning and cutting.
Assembling the Table Top
Lay the cut boards on a flat surface, arranging them in the desired pattern. Butt the edges together tightly. Apply wood glue to the edges where the boards meet. Use clamps to secure the boards together, ensuring they remain flush and aligned during the gluing process. Allow the glue to dry completely according to the manufacturer's instructions.
Adding Support and Stability
Once the glue is dry, add support and stability to the tabletop by attaching support boards to the underside. These boards, known as battens or cleats, run perpendicular to the pallet boards and prevent warping or bowing. Cut the support boards to the appropriate length and attach them using wood screws, ensuring they are evenly spaced. Pre-drilling pilot holes can prevent the wood from splitting.
Sanding and Finishing
After assembling and reinforcing the tabletop, sand the entire surface again, focusing on any uneven areas or rough edges. This final sanding prepares the wood for finishing. The choice of finish depends on the desired aesthetic and level of protection. Options include clear sealant, stain, paint, or varnish. Apply the chosen finish according to the manufacturer's instructions, allowing ample drying time between coats.
Attaching the Table Top to a Base
The final step involves attaching the finished tabletop to a suitable base. The base can be purchased pre-made or constructed from various materials such as metal, wood, or even repurposed items. Use appropriate fasteners, such as screws or bolts, to securely attach the tabletop to the base, ensuring a stable and functional table.
Variations and Customization
The beauty of working with pallet wood lies in its versatility. Numerous variations and customizations can be incorporated into the design. Consider incorporating different colored boards, creating patterns with the wood grain, or adding inlays or other decorative elements. The edges of the tabletop can be left natural, routed for a more refined look, or even live edge for a rustic appeal.
Safety Precautions
Throughout the entire process, prioritize safety. Always wear appropriate safety gear, including safety glasses and gloves. Exercise caution when using power tools, and follow manufacturer instructions. Work in a well-ventilated area, especially when using finishes or stains.

Build A Diy Pallet Table With Herringbone Design Lovely Greens

Wood Pallet Table Diy A Beautiful Mess

How To Build A Farmhouse Table With Pallet Wood Herringbone Top Kezzabeth Diy Renovation Blog

Beautiful Potentially Short Lived Tabletop Made From Pallet Wood Core77

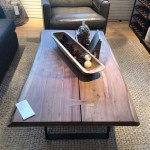
Diy Pallet Wood Coffee Table

Wood Pallet Table Diy A Beautiful Mess

25 Unique Diy Pallet Table Ideas 99 Pallets Casa Palete Reciclado Móveis

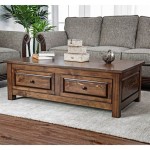
One Of A Kind Pallet Wood Dining Table

Diy Pallet Wood Coffee Table

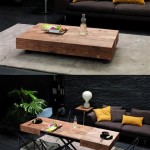
Diy Pallet Table Tops
Related Posts