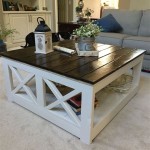
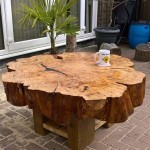
How to Paint a Coffee Table Distressed White
Distressing furniture can add character and charm to a piece, giving it a vintage or farmhouse aesthetic. Painting a coffee table distressed white is a popular technique for achieving this look, allowing you to transform a tired or outdated piece into a focal point of your living room. This article details the necessary steps, materials, and techniques for successfully completing such a project.
The process involves several stages, from preparation to final finishing, each crucial for achieving a desired outcome. Careful attention to detail in each step contributes to the overall quality and longevity of the finished piece. This includes proper surface preparation, the application of multiple coats of paint, and controlled distressing techniques.
Key Point 1: Preparation is Paramount
The foundation of any successful painting project lies in thorough preparation. This stage ensures proper adhesion of the paint, resulting in a durable and visually appealing finish. Neglecting preparation can lead to issues such as peeling, chipping, and an uneven surface, ultimately detracting from the distressed aesthetic. The following steps outline the essential preparatory measures.
Cleaning the Surface: Begin by thoroughly cleaning the coffee table to remove any dirt, dust, grease, or wax. Use a mild detergent and warm water solution, followed by a clean, damp cloth to wipe away any residue. Allow the surface to dry completely before proceeding.
Sanding: Sanding is critical for creating a textured surface that promotes paint adhesion. If the coffee table has a glossy finish, sanding becomes even more vital. Use a medium-grit sandpaper (around 120-grit) to scuff the entire surface. Pay particular attention to edges and corners, as these are areas where the paint is more likely to chip or peel without proper sanding. For intricate details or hard-to-reach areas, consider using a sanding sponge or detail sander.
Repairing Imperfections: Inspect the coffee table for any imperfections, such as dents, scratches, or chips. These should be repaired before painting. Use wood filler to fill any gaps or imperfections, following the manufacturer's instructions. Allow the wood filler to dry completely, then sand it smooth to blend seamlessly with the surrounding surface.
Priming (Optional but Recommended): Applying a primer is generally recommended, especially if the coffee table is made of a dark wood or has a varnished surface. Primer provides a uniform base for the paint, ensuring better adhesion and color coverage. Choose a primer specifically designed for furniture or woodwork. Apply a thin, even coat of primer using a brush, roller, or spray gun. Allow the primer to dry completely according to the manufacturer's instructions. Once dry, lightly sand the primed surface with a fine-grit sandpaper (around 220-grit) to create a smooth base for the paint.
Taping Off Areas (Optional): If the coffee table has any sections that you do not want to paint, such as metal legs or decorative inlays, carefully tape them off using painter's tape. Ensure the tape is firmly adhered to the surface to prevent paint bleeding.
Key Point 2: Applying the Paint and Distressing Techniques
Once the coffee table is properly prepared, the next step is to apply the paint and create the distressed effect. This stage involves selecting the appropriate paint, applying it in thin, even coats, and employing various distressing techniques to achieve the desired vintage aesthetic. The choice of distressing technique often depends on personal preference and the desired overall look.
Choosing the Right Paint: Opt for a high-quality latex or chalk paint in a white or off-white shade. Chalk paint is a popular choice for distressing projects because it adheres well to most surfaces and is easy to sand. Latex paint is also a good option and can provide a more durable finish.
Applying the Base Coat: Apply the first coat of paint in thin, even strokes using a brush, roller, or spray gun. Avoid applying too much paint in one area, as this can lead to drips and uneven coverage. Allow the first coat to dry completely according to the manufacturer's instructions.
Applying Subsequent Coats: Apply a second coat of paint, again in thin, even strokes. Depending on the color of the coffee table and the desired opacity, you may need to apply a third coat. Allow each coat to dry completely before applying the next.
Distressing Techniques: There are several techniques that can be used to create a distressed effect. The following are some common methods:
Sanding: This is the most common and versatile distressing technique. Use sandpaper (typically a medium-grit, like 120-grit, followed by a finer grit, like 220-grit) to sand away the paint in areas where natural wear and tear would occur, such as edges, corners, and raised details. Apply more pressure in these areas to reveal the underlying wood or primer. Vary the pressure and direction of sanding to create a more natural and random effect.
Wet Distressing: This technique involves using a damp cloth to wipe away the paint while it is still wet. This is particularly effective for creating a subtle, weathered look. After applying a coat of paint, use a damp cloth to gently wipe away the paint in desired areas. This will reveal the underlying layer of paint or the wood beneath.
Dry Brushing: This technique involves using a dry brush with a small amount of paint to create a textured, streaked effect. Dip the tip of a dry brush into the paint, then wipe off most of the paint onto a paper towel. Lightly drag the brush across the surface of the coffee table, following the grain of the wood. This will create a subtle, uneven texture that resembles natural wear.
Chipping: This technique involves creating small chips or imperfections in the paint to add a more rustic look. Use a putty knife or a similar tool to gently chip away at the paint in desired areas. This can be done randomly or strategically to accentuate certain features of the coffee table.
Layering Colors: This technique involves applying multiple layers of different colors of paint, then sanding through the layers to reveal the underlying colors. This can create a more complex and visually interesting distressed effect. Apply a base coat of a different color, such as gray or brown, before applying the white paint. Then, sand through the white paint to reveal the base coat in certain areas.
Experiment with different distressing techniques to find the ones that best suit your desired aesthetic. Remember to distress in a controlled and deliberate manner, avoiding excessive or unnatural-looking wear.
Key Point 3: Sealing and Protection
Once the paint and distressing are complete, it is essential to seal the coffee table to protect the finish and prevent further wear and tear. Sealing helps to preserve the distressed aesthetic and ensures the longevity of the painted surface. The choice of sealant depends on the type of paint used and the desired level of sheen.
Choosing the Right Sealant: Select a sealant that is compatible with the type of paint you used. For latex paint, a water-based polyurethane is a good choice. For chalk paint, a wax sealant or a matte finish polyurethane is often recommended. Consider the desired level of sheen when choosing a sealant. Polyurethane is available in different sheens, such as matte, satin, semi-gloss, and gloss. Wax sealants typically provide a matte or low-luster finish.
Waxing (for Chalk Paint): If using chalk paint, consider applying a wax sealant. Apply a thin, even coat of wax using a brush or a lint-free cloth. Work the wax into the surface of the paint, then buff it with a clean cloth to remove any excess wax and create a smooth, polished finish. Wax sealants provide a soft, matte finish and can be buffed to a subtle sheen. Reapply wax periodically to maintain the protection and appearance of the finish.
Applying Polyurethane: If using polyurethane, apply a thin, even coat using a brush, roller, or spray gun. Avoid applying too much polyurethane in one area, as this can lead to drips and uneven coverage. Allow the first coat to dry completely according to the manufacturer's instructions. Lightly sand the dried polyurethane with a fine-grit sandpaper (around 320-grit) to create a smooth surface for the next coat.
Applying Subsequent Coats of Polyurethane: Apply a second coat of polyurethane, again in thin, even strokes. Depending on the desired level of protection and durability, you may need to apply a third coat. Allow each coat to dry completely before applying the next. Lightly sand between coats to ensure a smooth, even finish.
Curing Time: Allow the sealant to cure completely according to the manufacturer's instructions. This may take several days or even weeks, depending on the type of sealant used. Avoid placing heavy objects on the coffee table during the curing period to prevent damage to the finish.
By following these steps, anyone can successfully paint a coffee table distressed white. Proper preparation, careful application of paint, strategic distressing techniques, and a protective sealant contribute to a durable and visually appealing finished product. The result is a unique and personalized piece of furniture that adds character and style to any living space.

How To Distress Wood Furniture With Milk Paint And Wet Rag Sanding Simplicity In The South

Diy Painting Aging Techniques For Living Room Coffee Tables My Desired Home Shabby Chic Table Distressed Painted

How To Whitewash Distress Furniture Diy Farmhouse Coffee Table Simply Taralynn Food Lifestyle Blog

Distressed Coffee Table The Painted Hive

Distressed Coffee Table Using Satin White Sanded Top With Oiled And Grey Stain Farmhouse Decor

White Distressed Coffee Table 5 Easy Steps Home And Garden Smatterings

How To Distress Wood Furniture With Milk Paint And Wet Rag Sanding Simplicity In The South

Whitewashed Distressed Coffee Table Shabby Chic Farmhouse Decor Living Room

How To Distress Wood Furniture With Milk Paint And Wet Rag Sanding Simplicity In The South

Coffee Table Makeover Part One Painted Tables Furniture
Related Posts

