How To Paint Coffee Table Rustic Wooden Legs
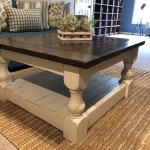
Painting coffee table legs to achieve a rustic aesthetic can dramatically transform the look of a piece of furniture. This process involves careful preparation, strategic application of various painting techniques, and protective finishing. The objective is to create an aged, worn appearance that complements a variety of interior design styles, from farmhouse to industrial.
Before commencing the project, understanding the different methods for achieving a rustic finish is crucial. Techniques like dry brushing, layering, and distressing are commonly employed to mimic the effects of time and wear. The choice of paint colors, types of brushes, and finishing products also significantly contribute to the final outcome. This article provides a detailed guide on how to paint coffee table legs for a rustic wooden look.
Preparation is Paramount
The longevity and aesthetic appeal of the painted finish depend heavily on the initial preparation. This phase involves cleaning, sanding, and priming the wooden legs. Failure to adequately prepare the surface can lead to paint adhesion issues, uneven texture, and a generally substandard result.
Begin by thoroughly cleaning the coffee table legs. Remove any existing dirt, dust, grease, or grime using a mild detergent and water solution. A clean surface ensures proper paint adhesion. Allow the legs to dry completely before proceeding. Use a tack cloth to remove any remaining dust particles.
Next, sand the wooden legs to create a slightly rough texture. This roughened surface provides a better grip for the paint. Use sandpaper with a grit between 120 and 220. For legs with a pre-existing finish, sanding is particularly important to remove the sheen and create a receptive surface. Sand in the direction of the wood grain to avoid unsightly scratches. After sanding, remove all sanding dust with a tack cloth or a vacuum cleaner with a brush attachment.
Applying a primer is essential, especially if the legs are made from bare wood or have a dark finish. Primer seals the wood, prevents tannins from bleeding through the paint, and provides a uniform surface for the topcoat. Choose a primer specifically designed for wood surfaces. Apply the primer in thin, even coats using a brush, roller, or spray gun. Allow the primer to dry completely according to the manufacturer's instructions before moving on to the painting stage. For a rustic look, consider using a tinted primer that slightly contrasts with the topcoat to allow for subtle color variation during the distressing process.
Applying Paint and Achieving a Rustic Effect
Once the preparation is complete, the painting process begins. This is where the specific techniques for achieving a rustic finish are implemented. The choice of paint colors and application methods will dictate the final appearance of the coffee table legs.
Select paint colors that complement the desired rustic aesthetic. Neutral tones like whites, creams, grays, and browns are typically used as base colors. Accent colors, such as blues, greens, or reds, can be incorporated for added depth and visual interest. Consider using chalk paint or milk paint, as these types of paint often lend themselves well to a distressed finish. These paints tend to adhere well to surfaces and are easy to sand and distress.
Apply the base coat of paint in thin, even layers. Allow each coat to dry completely before applying the next. Multiple thin coats are preferable to one thick coat, as they result in a smoother, more durable finish. Use a brush, roller, or spray gun to apply the paint, depending on your preference and the complexity of the leg design. If using a brush, choose a high-quality brush with synthetic bristles to minimize brushstrokes and ensure even coverage.
Dry brushing is a technique that involves applying a small amount of paint to a dry brush and lightly brushing it onto the surface. This creates a textured, weathered look. Dip the tips of the brush bristles into the paint, then wipe off most of the paint onto a paper towel. Lightly drag the brush across the surface of the legs, focusing on edges and corners. The minimal amount of paint on the brush will create a subtle, uneven application that mimics natural wear. Experiment with different colors and brushstrokes to achieve the desired effect.
Layering involves applying multiple coats of different colors and then partially removing some of the layers to reveal the colors underneath. This technique creates a complex, aged appearance. Apply a base coat of one color, let it dry, and then apply a second coat of a different color. Once the second coat is dry, use sandpaper or a sanding block to remove some of the topcoat in strategic areas, such as edges, corners, and raised details. This will expose the base coat and create a layered effect that resembles years of wear and tear. Experiment with different color combinations to achieve the desired aesthetic.
Distressing is the process of intentionally damaging the paint finish to create a worn, aged look. This can be achieved using various tools, such as sandpaper, sanding blocks, wire brushes, or even chains. Focus on areas that would naturally experience wear, such as edges, corners, and areas around knobs or pulls. Use sandpaper with varying grits to create different levels of distress. Start with a coarser grit to remove larger areas of paint, and then switch to a finer grit to smooth out the edges and blend the distressed areas with the surrounding paint. Be careful not to over-distress the legs, as this can result in an unnatural or unattractive finish. Aim for a balanced, subtle effect that enhances the rustic aesthetic.
Protecting the Finish
After achieving the desired rustic look, it is essential to protect the painted finish with a clear coat. This will prevent chipping, scratching, and fading, and ensure that the coffee table legs maintain their appearance for years to come.
Choose a clear coat that is compatible with the type of paint used. Water-based polyurethane is a popular choice for its durability and ease of application. Oil-based polyurethane provides a harder, more durable finish but can yellow over time. Avoid using shellac, it's not a good choice for areas with heavy use. Test the clear coat on a small, inconspicuous area of the legs to ensure that it does not react negatively with the paint. This will help prevent any unexpected discoloration or damage to the finished surface.
Apply the clear coat in thin, even layers using a brush, roller, or spray gun. Allow each coat to dry completely before applying the next. Multiple thin coats are preferable to one thick coat, as they result in a smoother, more durable finish. Lightly sand between coats with fine-grit sandpaper to remove any imperfections and ensure proper adhesion. Remove all sanding dust with a tack cloth before applying the next coat. Follow the manufacturer's instructions for drying times and application techniques.
For added protection, consider applying a wax finish over the clear coat. Wax provides a soft, matte sheen and helps to protect the finish from scratches and moisture. Apply the wax with a soft cloth, working it into the surface of the legs in a circular motion. Allow the wax to dry for the recommended time, and then buff it with a clean cloth to create a smooth, polished finish. Reapply the wax periodically to maintain the luster and protection of the painted finish.
After applying the clear coat or wax finish, allow the coffee table legs to cure completely before reattaching them to the table. Curing times can vary depending on the type of finish used, so consult the manufacturer's instructions for specific recommendations. Avoid placing any heavy objects on the legs during the curing process to prevent damage to the finish. Once the legs are fully cured, they can be safely reattached to the table, and the coffee table can be enjoyed for years to come.
By following these steps, one can successfully paint coffee table legs to achieve a rustic wooden look. The key to success lies in thorough preparation, strategic application of painting techniques, and protective finishing. The result is a piece of furniture that exudes character and charm.

How To Refinish A Rustic Wood Coffee Table With Beautiful Results

How To Paint Table Legs The Fast And Easy Way

Rustic Coffee Table Makeover Life On Kaydeross Creek

How To Paint A Weathered Wood Finish On Furniture

Chalk Paint Coffee Table Makeover Step By Diy Guide Bricks N Blooms With Stacy Ling

How To Refinish A Table Farmhouse Style My 100 Year Old Home

Pine Coffee Table Makeover Farmhouse Style Lost Found

Coffee Table Makeover Stained The Top And Painted Legs With A Homemade Chalk Paint Distressed Sealed Dark Wax

How To Refinish A Rustic Wood Coffee Table With Beautiful Results

Coffee Table Makeover Man Cave Furniture With Rust Paint Do Dodson Designs
Related Posts

