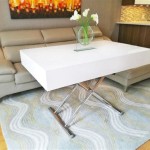
How to Paint a Dining Table Distressed White for Wood
Transforming a wooden dining table with a distressed white finish offers a unique aesthetic, blending vintage charm with modern functionality. This process, while requiring patience, can be undertaken by individuals with moderate DIY skills. The following article provides a comprehensive guide to achieving a professionally distressed white dining table, highlighting crucial steps from preparation to final detailing.
Preparation: Laying the Foundation for a Flawless Finish
The initial stage of any painting project is arguably the most important. Proper preparation ensures the paint adheres correctly, prevents future chipping or peeling, and ultimately contributes to the longevity of the finished product. This phase involves cleaning, sanding, and priming the dining table.
Begin by thoroughly cleaning the dining table. Use a degreasing cleaner to remove any existing grease, grime, or wax buildup. These contaminants can impede paint adhesion, leading to an uneven finish. Wipe the entire surface clean with a damp cloth and allow it to dry completely. This step is crucial, especially if the table has been regularly used for meals.
Next, sanding is necessary. The extent of sanding depends on the existing finish. If the table has a glossy finish, a more aggressive sanding approach is required. Use a medium-grit sandpaper (around 120-grit) to remove the existing sheen and create a rough surface for the primer to grip. For tables with a matte finish, a light sanding with a finer-grit sandpaper (around 220-grit) may suffice. Always sand in the direction of the wood grain to avoid scratching. After sanding, remove all sanding dust with a tack cloth or a vacuum cleaner with a brush attachment. Dust particles can compromise the paint finish, creating a bumpy texture.
After sanding and cleaning, apply a primer. Primer serves several purposes: it seals the wood, provides a uniform surface for the paint, and enhances paint adhesion. Choose a high-quality oil-based or latex-based primer, depending on the type of paint that will be used. Oil-based primers are known for their excellent adhesion and sealing properties, while latex-based primers are easier to clean up and have lower VOCs (volatile organic compounds). Apply the primer in thin, even coats using a brush, roller, or spray gun. Allow the primer to dry completely according to the manufacturer's instructions, typically 24 hours. Once dry, lightly sand the primed surface with a fine-grit sandpaper (around 320-grit) to smooth out any imperfections. Again, remove all sanding dust before proceeding to the next step.
Painting: Achieving the Desired White Finish
With the table properly prepared, the next step is applying the white paint. The choice of paint depends on personal preference and desired durability. Milk paint, chalk paint, and latex paint are all viable options, each offering unique characteristics and requiring specific application techniques.
Milk paint provides a matte, porous finish that is ideal for achieving a distressed look. It is environmentally friendly and comes in powdered form, requiring mixing with water. Chalk paint is another popular choice, known for its ease of use and ability to adhere to various surfaces without significant preparation. It also produces a matte finish that is easily distressed. Latex paint, a more conventional option, offers durability and a wider range of sheen levels. If using latex paint, select a matte or eggshell finish to mimic the look of milk or chalk paint.
Regardless of the paint type chosen, applying thin, even coats is crucial. Apply the first coat of white paint using a brush, roller, or spray gun. If using a brush, apply long, smooth strokes in the direction of the wood grain. If using a roller, apply the paint in overlapping sections to ensure even coverage. If using a spray gun, maintain a consistent distance and speed to avoid drips or runs. Allow the first coat to dry completely according to the manufacturer's instructions, typically several hours or overnight. Once dry, lightly sand the surface with a fine-grit sandpaper (around 320-grit) to smooth out any imperfections. Remove all sanding dust before applying the second coat.
Apply a second coat of white paint, following the same techniques as the first coat. The second coat will provide better coverage and enhance the durability of the finish. Allow the second coat to dry completely before proceeding to the distressing stage. The drying time is dependent upon the surrounding temperature and humidity. Patience is important in this phase. Rushing the drying process could lead to imperfections in the final product.
Distressing: Creating the Vintage Aesthetic
The distressing process is what gives the dining table its unique, aged character. This involves strategically removing paint to expose the underlying wood or primer, creating a worn and vintage aesthetic. There are several techniques that can be used to distress painted furniture, each producing slightly different results.
One common technique is sanding. After the paint has completely dried, use sandpaper to remove paint from areas that would naturally experience wear and tear, such as edges, corners, and around handles or knobs. Experiment with different grit sandpapers to achieve varying degrees of distressing. Start with a medium-grit sandpaper (around 120-grit) for more aggressive distressing and then switch to a finer-grit sandpaper (around 220-grit) for more subtle effects. Apply the sandpaper with light pressure and work in small sections, checking the progress frequently. Avoid sanding too much, as it is easier to remove more paint than to add it back.
Another distressing technique involves using a damp cloth. After applying the second coat of paint, while the paint is still slightly damp, gently rub certain areas with a damp cloth to remove some of the paint. This technique is particularly effective for creating a subtle, weathered look. The amount of paint removed depends on the amount of pressure applied and the dampness of the cloth.
A third technique involves using a chipping tool or a putty knife. After the paint has completely dried, use a chipping tool or a putty knife to carefully chip away small pieces of paint from edges, corners, and other areas. This technique creates a more rustic and aged look. Exercise caution when using a chipping tool, as it can easily remove too much paint. Practice on a hidden area of the table before distressing the more visible surfaces.
Regardless of the distressing technique used, the key is to be strategic and intentional. Consider how the table would naturally wear over time and focus on those areas. Avoid creating a uniform or symmetrical distressed pattern, as this will look unnatural. Aim for a random and organic look that mimics the effects of age and use.
After distressing, carefully remove all sanding dust or paint chips with a tack cloth or a vacuum cleaner with a brush attachment. This will ensure a clean and smooth surface for the final sealing step.
Sealing: Protecting the Distressed Finish
Sealing the distressed white finish is essential for protecting the paint and wood from moisture, dirt, and wear and tear. A sealant will also enhance the durability of the finish and make it easier to clean. Several sealant options are available, including wax, polyurethane, and varnish.
Wax is a popular choice for sealing distressed furniture, as it provides a soft, matte finish and enhances the vintage aesthetic. Apply a thin layer of wax using a brush or a lint-free cloth, working in small sections. Allow the wax to dry for the recommended time, typically a few minutes, and then buff the surface with a clean, lint-free cloth. Buffing will remove any excess wax and create a smooth, polished finish. Wax requires periodic reapplication to maintain its protective properties.
Polyurethane provides a more durable and water-resistant seal than wax. It is available in various sheen levels, from matte to glossy. Use a matte or satin polyurethane to maintain the distressed look. Apply thin, even coats of polyurethane using a brush, roller, or spray gun. Allow each coat to dry completely according to the manufacturer's instructions before applying the next coat. Lightly sand between coats with a fine-grit sandpaper (around 320-grit) to smooth out any imperfections. Polyurethane is a good choice for dining tables that will be subjected to heavy use or moisture.
Varnish is another durable option for sealing distressed furniture. It is similar to polyurethane but is often more resistant to scratches and chemicals. Apply varnish in thin, even coats using a brush, roller, or spray gun. Allow each coat to dry completely before applying the next coat. As with polyurethane, light sanding between coats is recommended to achieve a smooth finish.
Regardless of the sealant chosen, applying multiple thin coats is generally better than applying one thick coat. Thin coats will dry more evenly and prevent runs or drips. Always follow the manufacturer's instructions for application and drying times. Allow the sealant to cure completely before using the dining table. Curing can take several days or even weeks, depending on the sealant type and environmental conditions.
Once the sealant has fully cured, the distressed white dining table is ready for use. With proper care and maintenance, this transformed piece of furniture will add a touch of vintage charm and character to any dining room. Regular cleaning with a damp cloth and occasional reapplication of wax (if applicable) will help maintain the beauty and durability of the distressed finish for years to come.

Antique Dining Table Updated With Chalk Paint Anderson Grant

Antique Dining Table Updated With Chalk Paint Anderson Grant

Farmhouse White Dining Room Table Miss Mustard Seed

Whitewashed Reclaimed Wood Dining Table Satori Design For Living

How To Distress Furniture My New White Dining Table Thrifty And Chic

How To Paint Stain Whitewash Distress A Fancy X Farmhouse Table By Ana White Building Our Rez

Painting My Antique Table Vintage Porch

The Beginner S Guide To Distressing With Chalk Paint By Annie Sloan Thinking Closet

How To Refinish Furniture Into A Beautiful Wood Dining Table Sunnyside Home

Old World Chippy Distressed Paint Finish Ana White
Related Posts