How To Refinish A Coffee Table With Chalk Paint
Refinishing a coffee table can significantly enhance its aesthetic appeal, transforming a worn or outdated piece into a stylish centerpiece. Chalk paint, known for its matte finish, ease of application, and excellent adhesion, is a popular choice for this type of project. This article provides a detailed guide on how to refinish a coffee table using chalk paint, covering preparation, painting techniques, and sealing for durability.
Preparing the Coffee Table Surface
Proper preparation is crucial for achieving a professional and long-lasting finish. This phase involves cleaning, sanding, and addressing any existing imperfections on the coffee table's surface. The primary goal is to create a smooth, clean, and slightly roughened foundation for the chalk paint to adhere to effectively.
Begin by thoroughly cleaning the coffee table. Use a mild detergent mixed with warm water to remove any dirt, grease, wax, or other contaminants. A degreaser can be used for stubborn greasy areas. Ensure all surfaces are cleaned, including legs, edges, and any decorative elements. Rinse the coffee table with clean water to remove any soap residue, and then allow it to dry completely.
Once the coffee table is dry, assess the existing finish. If the existing finish is glossy, peeling, or damaged, sanding is necessary. Use a medium-grit sandpaper (around 120-grit) to lightly sand the entire surface of the coffee table. The aim is not to remove the existing finish completely, but rather to create a slightly textured surface to which the chalk paint can bond. Pay particular attention to areas where the finish is peeling or chipping, ensuring these areas are smoothed out as much as possible.
For coffee tables with intricate carvings or details, use fine-grit sandpaper (around 220-grit) to avoid damaging the delicate features. Alternatively, a sanding sponge can be used, as it conforms better to curved surfaces and allows for more control. After sanding, remove all sanding dust with a tack cloth or a damp cloth. Ensure the surface is completely free of dust before proceeding to the next step.
Inspect the coffee table for any imperfections such as dents, scratches, or gouges. These imperfections can be filled with wood filler. Apply the wood filler evenly over the affected areas, following the manufacturer's instructions. Allow the wood filler to dry completely, and then sand it smooth with fine-grit sandpaper, blending it seamlessly with the surrounding surface. Again, remove all sanding dust before moving on.
In some cases, a primer may be necessary. If the coffee table is made of a material that is prone to staining or bleeding, such as certain types of wood or laminate, applying a primer can prevent these issues from affecting the final finish. Choose a primer that is compatible with both the existing finish and the chalk paint you intend to use. Apply the primer in thin, even coats, allowing each coat to dry completely before applying the next.
Applying Chalk Paint
The application of chalk paint is a straightforward process, but attention to detail is essential for achieving a smooth and even finish. This phase involves selecting the right type of chalk paint, applying it in thin coats, and allowing sufficient drying time between coats.
Choosing the right chalk paint is the first step. Numerous brands of chalk paint are available, each with its own unique characteristics. Consider factors such as color, coverage, and durability when making your selection. It is also important to choose a paint that is specifically formulated for furniture, as these paints tend to have better adhesion and resistance to wear and tear.
Before applying the chalk paint, stir it thoroughly to ensure that the pigments are evenly distributed. Avoid shaking the can, as this can create air bubbles that may affect the finish. If necessary, thin the chalk paint with a small amount of water to improve its flow and workability. However, be careful not to over-thin the paint, as this can reduce its coverage and durability.
Use a high-quality brush or roller to apply the chalk paint. A brush with synthetic bristles is generally recommended for chalk paint, as it tends to provide a smoother finish than a brush with natural bristles. A foam roller can also be used, particularly for large, flat surfaces. Apply the chalk paint in thin, even coats, working in the direction of the wood grain. Avoid applying the paint too thickly, as this can lead to drips and uneven drying.
Allow each coat of chalk paint to dry completely before applying the next. Drying times can vary depending on the humidity and temperature, so it is important to follow the manufacturer's instructions. A general rule of thumb is to allow at least two hours of drying time between coats. If the paint feels tacky or soft to the touch, it is not yet fully dry.
Typically, two to three coats of chalk paint are required to achieve full coverage. With chalk paint, the first coat might look uneven or patchy. This is normal. Apply each coat in the same manner, using thin, even strokes. Once all coats have been applied and dried, inspect the surface for any imperfections. If necessary, lightly sand any rough spots with fine-grit sandpaper.
For a distressed look, consider using a wet rag to gently rub away some of the paint along edges and corners after the final coat has dried. This technique reveals the underlying finish, creating a worn and aged appearance. Experiment with different levels of distressing to achieve the desired effect. Avoid over-distressing, as this can detract from the overall aesthetic.
Sealing the Chalk Paint
Sealing the chalk paint is essential for protecting the finish and enhancing its durability. Chalk paint is porous and susceptible to damage from moisture and wear. A sealant provides a protective barrier, preventing stains, scratches, and water damage.
Several options are available for sealing chalk paint, including wax, polyurethane, and varnish. Each type of sealant has its own advantages and disadvantages. Wax provides a soft, matte finish and is easy to apply, but it offers less protection than polyurethane or varnish. Polyurethane and varnish provide a more durable finish that is resistant to scratches and water damage, but they can be more difficult to apply and may alter the color of the chalk paint.
If using wax, apply it in thin, even coats with a wax brush or a lint-free cloth. Work the wax into the chalk paint, ensuring that it penetrates all the nooks and crannies. Allow the wax to dry for at least 30 minutes, and then buff it with a clean cloth to create a smooth, polished finish. Multiple coats of wax can be applied for added protection.
If using polyurethane or varnish, choose a water-based product to avoid yellowing the chalk paint. Apply the sealant in thin, even coats with a brush or roller. Allow each coat to dry completely before applying the next. Two to three coats of sealant are typically required for adequate protection. Lightly sand between coats with fine-grit sandpaper to remove any imperfections and ensure a smooth finish.
Consider using a matte or satin finish sealant to maintain the chalk paint's characteristic matte appearance. Glossy sealants can change the overall look of the coffee table, making it appear more modern. A matte or satin finish sealant will protect the chalk paint while preserving its original aesthetic.
Allow the sealant to cure completely before using the coffee table. Curing times can vary depending on the type of sealant used, so it is important to follow the manufacturer's instructions. Generally, it is recommended to wait at least 24-48 hours before placing any items on the coffee table. This allows the sealant to fully harden and provide maximum protection.
Regular cleaning and maintenance will help to prolong the life of the refinished coffee table. Wipe the surface with a damp cloth to remove any dirt or spills. Avoid using harsh chemicals or abrasive cleaners, as these can damage the finish. For stubborn stains, use a mild detergent diluted with water. With proper care, a refinished coffee table using chalk paint can provide years of enjoyment and enhance the aesthetic of any living space.

How To Refinish A Coffee Table With Milk And Chalk Paint 1905 Farmhouse

Old Thrift Coffee Table Transformed With Chalk Paint Polyshades Artsy Rule

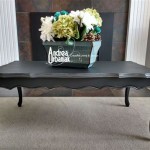
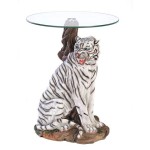
Gray Chalk Paint Coffee And Side Table Maison De Pax

Gray Chalk Paint Coffee And Side Table Maison De Pax

Sprucing Up The Coffee Table With Chalk Paint Stacy Ling

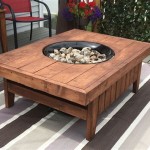
Farmhouse Coffee Table Makeover Our Southern Home

Easy Chalk Paint Coffee Table Makeover You Need To See

Chalk Paint Coffee Table Makeover Painted Tables

How To Refinish A Table Farmhouse Style My 100 Year Old Home

How To Refinish Furniture With Chalk Paint A Mom S Take
Related Posts