How To Replace Patio Table Glass
Patio tables with glass tops offer a sleek and modern aesthetic to outdoor spaces. However, glass is inherently susceptible to breakage due to accidents, weather events, or simple wear and tear. Replacing broken or damaged patio table glass is a manageable task that can restore the functionality and appearance of the furniture. This article provides a comprehensive guide on how to safely and effectively replace patio table glass.Before embarking on the replacement process, it is crucial to assess the extent of the damage and gather the necessary tools and materials. The type of glass required will depend on the table's design and original glass specifications. Safety precautions are paramount when handling broken glass to prevent injuries.
This guide will cover the following key aspects of patio table glass replacement: assessing the damage and determining the correct glass type, safely removing the broken glass, measuring for the new replacement glass, ordering the correct size and type of glass, and finally, installing the new glass top. Each step will be detailed with clear instructions and helpful tips to ensure a successful replacement.
Assessing Damage and Determining Glass Type
The initial step in replacing patio table glass is a thorough assessment of the damage. This involves carefully examining the broken glass to understand the extent of the damage and identify any potential safety hazards. It is also vital to determine the type of glass originally used in the table, as this will influence the selection of the replacement glass.
First, carefully inspect the broken glass. Is it shattered into many small pieces, or are there large, jagged fragments? This visual assessment helps determine the type of glass. Tempered glass, designed to shatter into small, relatively harmless pieces, is often used in patio furniture for safety reasons. If the glass has broken into sharp, large shards, it is likely annealed glass, which is less safe for outdoor use.
Examine the remaining glass or the table frame for any markings or labels. Manufacturers sometimes stamp specifications onto the glass itself or provide information in the product documentation. These markings may indicate the glass type, thickness, and tempering status. If this information is available, it simplifies the replacement process considerably.
If no markings are present, consider the original construction of the table. Higher-end patio tables often use tempered glass for its safety features. If the table was purchased from a reputable manufacturer or retailer, contact them to inquire about the original glass specifications. Provide the table's model number or a detailed description to assist in the identification process.
Measure the thickness of the remaining glass, if possible. This can be done using a caliper or a ruler with millimeter markings. The thickness of the glass is crucial for structural integrity and proper fit within the table frame. Common thicknesses for patio table glass range from 1/4 inch (6mm) to 1/2 inch (12mm). Ensure the replacement glass matches the original thickness.
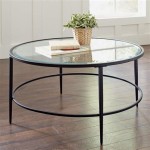
Consider the shape and edge finish of the original glass. Patio tables come in various shapes, including round, square, rectangular, and oval. The replacement glass must match the original shape precisely. The edge finish, such as polished, beveled, or seamed, also affects the appearance and safety of the table. Choose a replacement glass with a matching edge finish for a seamless look.
Safely Removing the Broken Glass
Removing broken glass requires caution and adherence to safety protocols to prevent cuts and injuries. This step involves carefully handling the broken pieces and disposing of them properly. Wearing appropriate protective gear is essential throughout the removal process.
Begin by donning protective gear. This includes wearing heavy-duty work gloves to protect hands from sharp edges. Safety glasses are also necessary to prevent glass shards from entering the eyes. Long sleeves and pants provide additional protection against cuts and scratches. If the glass is severely shattered, consider wearing a respiratory mask to avoid inhaling glass dust.
Carefully remove large pieces of broken glass first. Gently lift each piece, avoiding any sudden movements that could cause further breakage. Place the broken glass into a sturdy container, such as a cardboard box lined with heavy-duty trash bags. Avoid overfilling the container to prevent it from becoming too heavy or unstable.
For smaller shards and fragments, use a brush and dustpan to sweep them up. Pay close attention to corners and crevices where glass particles may accumulate. A vacuum cleaner with a hose attachment can also be used to remove small pieces, but be cautious not to damage the vacuum cleaner's filter or hose with sharp glass shards. After vacuuming, inspect the area again to ensure all glass particles have been removed.
If the glass is stuck in the table frame, gently use a putty knife or a flathead screwdriver to pry it loose. Be careful not to damage the frame during this process. If the glass is held in place by clips or fasteners, remove them carefully using the appropriate tools.
Once all the broken glass has been removed, thoroughly clean the table frame. Use a damp cloth to wipe away any remaining glass dust or debris. Inspect the frame for any damage, such as scratches or dents, and make any necessary repairs before installing the replacement glass.
Properly dispose of the broken glass. Seal the trash bags containing the glass shards securely and label the container clearly as "Broken Glass." Contact local waste management services for specific guidelines on disposing of broken glass safely and responsibly. Do not dispose of broken glass in regular household trash containers.
Measuring and Ordering the Replacement Glass
Accurate measurements are essential for ensuring that the replacement glass fits properly in the patio table frame. This step involves carefully measuring the dimensions of the opening and specifying the correct glass type, thickness, shape, and edge finish when placing the order.
Start by measuring the inside dimensions of the table frame where the glass will sit. Use a measuring tape or a ruler with millimeter markings for accurate measurements. Measure the length and width of rectangular or square tables, and the diameter of round tables. For oval or irregularly shaped tables, take multiple measurements at different points to capture the overall shape accurately.
If remnants of the original glass are available, use them as a template for measuring. Lay the broken pieces on a flat surface and trace the outline onto a piece of paper or cardboard. Use this template to verify the accuracy of the measurements and ensure that the replacement glass will fit properly.
Specify the glass type, thickness, shape, and edge finish when ordering the replacement glass. Tempered glass is generally recommended for patio tables due to its safety features. Choose the same thickness as the original glass to ensure proper fit and structural integrity. Select the correct shape and edge finish to match the original glass and maintain the table's aesthetic appeal.
When ordering from a glass supplier, provide detailed measurements and specifications. Include information about the table's intended use and any specific requirements, such as UV protection or heat resistance. Request a quote from multiple suppliers to compare prices and lead times.
Consider ordering custom-cut glass from a reputable glass company. Custom-cut glass ensures a precise fit and allows for specific edge finishes and other customizations. Provide the supplier with accurate measurements and specifications, and verify the order details before confirming the purchase.
Once the replacement glass has been ordered, it is important to store it safely until it is ready to be installed. Store the glass in a protected area away from potential impacts or extreme temperatures. Handle the glass carefully to avoid scratches or damage during storage. Upon receiving the replacement glass, inspect it thoroughly for any defects or damage before proceeding with the installation.
Before the arrival of the replacement glass, prepare the table frame. Clean the frame again to remove any dust or debris that may have accumulated. Inspect the frame for any damage or imperfections and make any necessary repairs. Ensuring the frame is in good condition will help facilitate a smooth and secure installation of the new glass.
Installing the New Glass Top
Installing the new glass top requires careful handling and alignment to ensure a secure and aesthetically pleasing fit. This step involves setting the glass into the frame, securing it with appropriate fasteners or supports, and cleaning the surface to remove any fingerprints or smudges.
Begin by cleaning the replacement glass thoroughly. Use a glass cleaner and a soft cloth to remove any dust, fingerprints, or smudges. Ensure the glass is completely clean and dry before installing it in the table frame.
Carefully lift the replacement glass and position it over the table frame. Align the edges of the glass with the frame, ensuring that it sits evenly and securely. If the glass is heavy or unwieldy, enlist the help of another person to assist with the lifting and positioning.
If the table frame has clips or fasteners, align the glass with the corresponding mounting points. Gently press the glass into place, ensuring that it is securely held by the clips or fasteners. Avoid applying excessive force, which could damage the glass or the frame.
If the table frame does not have clips or fasteners, use rubber bumpers or silicone pads to support the glass and prevent it from shifting. Place the bumpers or pads evenly around the perimeter of the frame, providing adequate support and cushioning for the glass. Ensure the bumpers or pads are securely attached to the frame.
Once the glass is in place, inspect it carefully to ensure that it is properly aligned and securely supported. Check for any gaps or unevenness between the glass and the frame. Adjust the position of the glass or the bumpers/pads as needed to achieve a perfect fit.
Use silicone sealant to secure the glass to the frame, if desired. Apply a thin bead of silicone sealant around the perimeter of the glass, where it meets the frame. Smooth the sealant with a finger or a tool to create a clean and even seal. Allow the sealant to dry completely before using the table.
Clean the glass surface one last time to remove any fingerprints or smudges that may have occurred during the installation process. Use a glass cleaner and a soft cloth to polish the glass and restore its shine.
After the installation is complete, inspect the table carefully to ensure that the replacement glass is securely in place and the table is stable. Allow sufficient time for any adhesives or sealants to cure completely before placing items on the table or using it for dining or other activities.

Diy Patio Table Top Fixing A Broken On Budget

Diy Replace Glass Tabletop With Tile Weekend Warrior Wednesday Your Modern Family Table Top Patio

Makeover An Outdoor Table And Refresh Chairs Deeply Southern Home

Diy Patio Table Top Fixing A Broken On Budget

Upcycle Broken Glass Patio Table With Wood

Pin On Tips

Tropitone How To Replace A Table Top

Diy Replace Glass Tabletop With Tile Weekend Warrior Wednesday Your Modern Family

Replacing Patio Tabletop Hometalk

Tips For Preventing Glass Table Tops From Sliding Majestic
Related Posts